
Using Split Screen to Save Time in Scrivener 3
By Gwen Hernandez | November 22, 2022 |
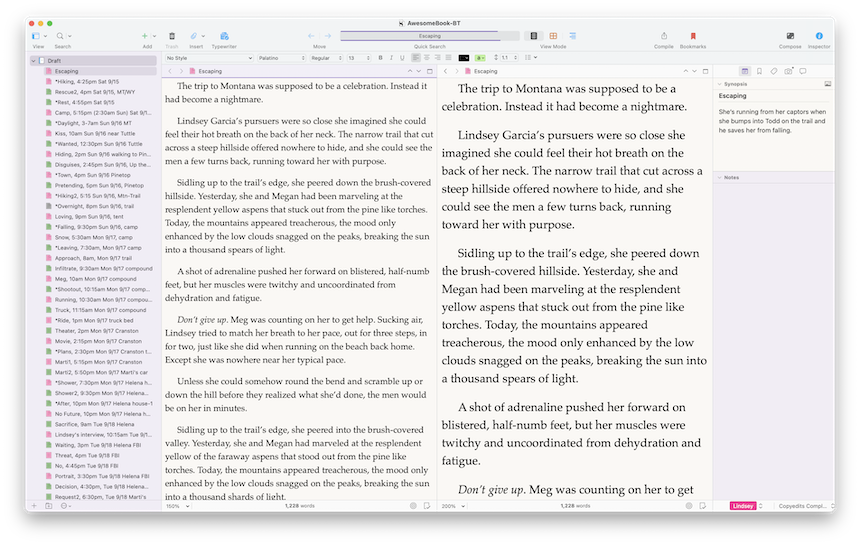
Do you ever find yourself switching between windows/programs to refer to research or images, or scrolling up and down within a document to view something you wrote in another section? If so, check out Scrivener’s Split Screen feature. It allows you to divide the Editor pane (where you write) into two panes, either horizontally or vertically (my personal preference).
I often use it to quickly look at what I wrote in a previous scene so I can be consistent or avoid being repetitive. Basically, any time I want to see something else in the project without “losing track” of the document I was working in, I split the screen.
Here are a few other ways to use it:
- View another part of the current document while working on it.
- Look at the end of the previous scene while working on the opening of the next one.
- Copy text from the same, or another document, without losing your place.
- Refer to research files, notes, character sheets, or photos while you write.
- See your outline in the Corkboard or Outline view in one pane, while you write in the other.
- View/search the entire manuscript in one pane (Scrivenings view), while keeping the scene/chapter you’re working on open in the other.
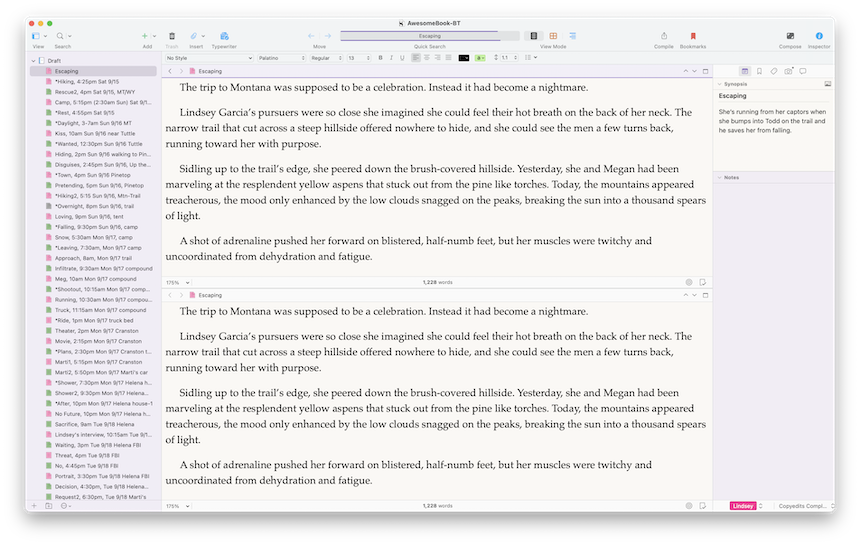
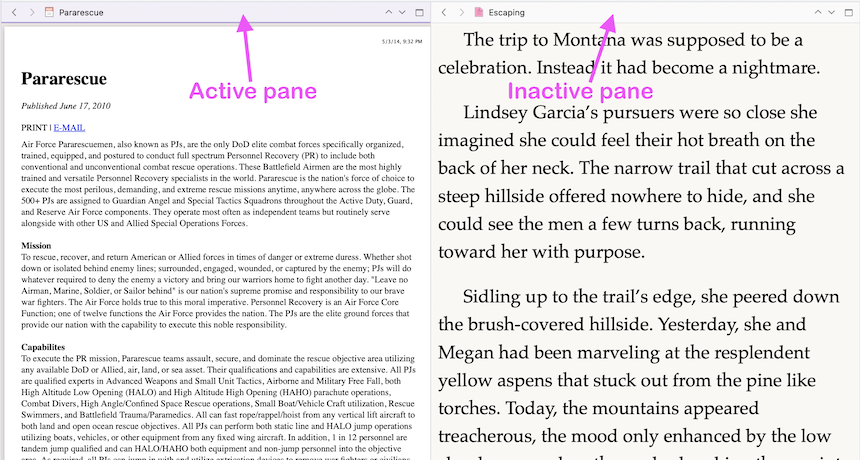
In my experience, the main source of confusion with Split Screen is that, initially, both panes display the same document, as shown below.
That can be handy for referring back to an earlier point in the same scene or chapter, but if you don’t want to view two locations in the same document, you can easily choose to view something else in one of the panes.
Splitting the Editor
To split the Editor, select a document in the Binder, and then do one of the following:
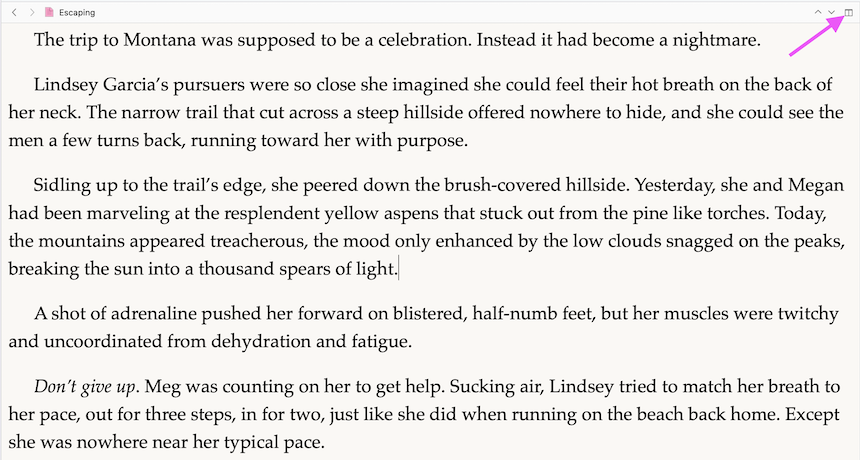
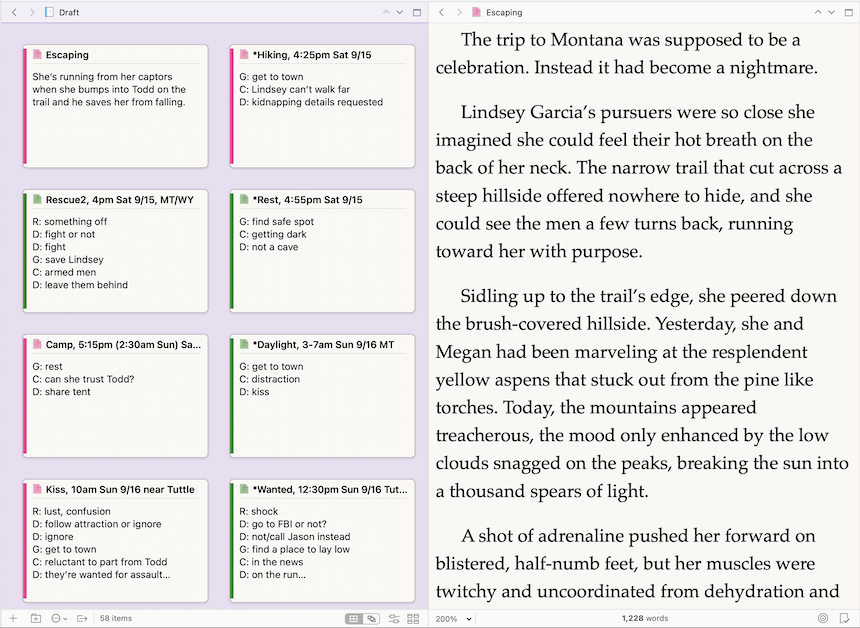
- Click the Toggle Split button in the upper right corner of the Editor (see image below). Hold the Option key (Mac) or Alt key (PC) on your keyboard to switch the split button between horizontal and vertical. Scrivener will remember your most recent orientation choice until you change it again.
- Go to View>Editor Layout>Split Horizontally/Split Vertically.
The Editor splits into two panes with the selected document displayed in both.
NOTE: Each pane can have separate zoom and Page View settings. You can also use the Edit>Find feature within just one pane.
Working with Split Screen
Each pane has its own header (see image below). The active pane’s header turns color (whatever color is dictated by your system settings). This is the pane that will be affected when you select a document, choose a menu option, or use the format bar.
Choosing the Active Pane
To designate the active pane, click anywhere in that pane’s editor. If it wasn’t already the active pane, the header will turn color.
Assigning a Document to the Active Pane
Once you’ve designated the active pane, click any document in the Binder to view it in the active pane.
Viewing a Group in the Active Pane
To view a group of files in the active pane, select the desired folder (or multiple-selection of files). Depending on the last choice you made when you selected a folder, you’ll either see the Corkboard, Outliner, or Scrivenings view.
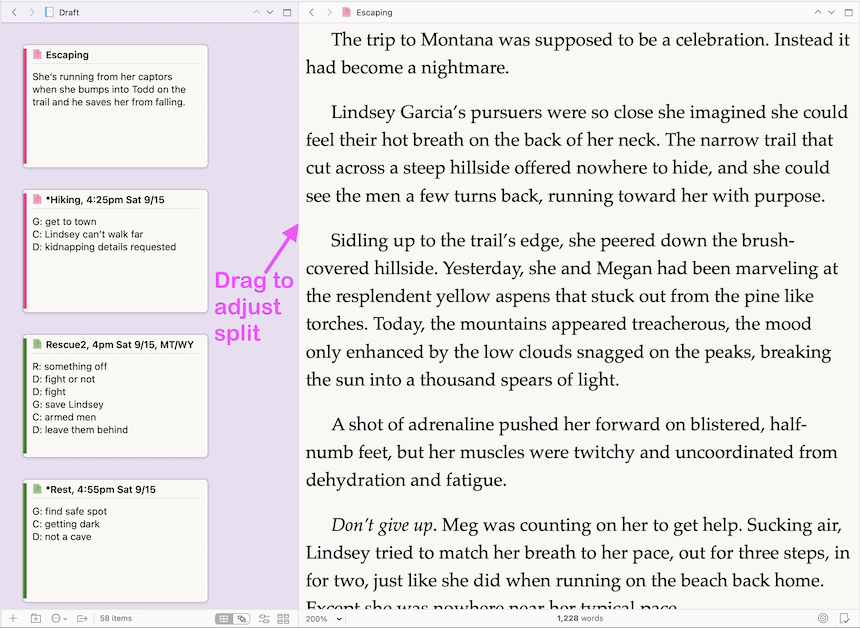
Adjusting the Split
To adjust the relative split of the panes, drag the bar that divides them.
Locking the Contents of a Pane
To prevent yourself from accidentally changing what’s viewed in a pane (say, by clicking something in the Binder while that pane is active), you can lock it.
To do so, right-click the header of the pane you want to lock, or go to Navigate>Editor>Lock in Place. Repeat to unlock.
In Windows, the locked pane turns pale red. On the Mac, a small lock appears in the header.
NOTE: You can lock both panes, if desired.
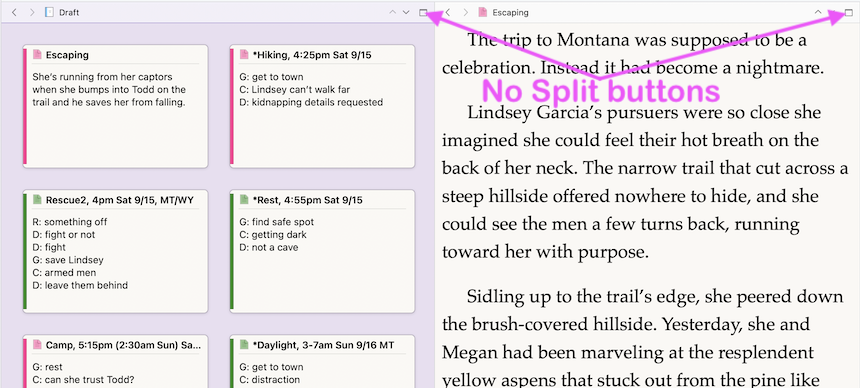
Exiting Split Screen
When you’re ready to go back to a single Editor pane, simply click the No Split button in the header of whichever pane you want to keep working in. Or, click in the pane you want to stay in and go to View>Editor Layout>No Split.
Do you think Split Screen might be useful in your own process? Got any questions about Split Screen or anything else in Scrivener? Just ask.
Gwen Hernandez (she/her) is the author of Scrivener For Dummies, Productivity Tools for Writers, and romantic suspense. She teaches Scrivener to writers all over the world through online classes and an extensive library of blog posts. Learn more about Gwen at gwenhernandez.com.
[coffee]


Also just multiple screens. Or, honestly, foldable book stands, phone stands, and book weights for reference.
But writers are some of the last to buy a second monitor in the creative fields and I think they’re actually the ones who need it the most because of how much visual space multiple reference docs take up
Yes, I love multiple monitors, Lancelot! But they’re a bit more difficult to use in my favorite writing chair or at the coffee shop. ;-) Also, for viewing different parts of the same manuscript, split screen is gold.
For sure. Though in Scrivener, correct me if I’m wrong, you could in theory pull up multiple binders and therefore view like 6-10 parts of the manuscript at once?
Isn’t that more like Jane Austen’s chunk writing?
Actually, each project file has one Binder (which is like a table of contents of everything in that project, as well as the navigation tool for viewing those items), and a project usually holds one manuscript (though you could use a single project for a book series, or to hold all of your blog posts). Spreading the manuscript over multiple projects kind of defeats the purpose of Scrivener.
If you wanted to view more than two documents that are in the same project at once, there are additional options. Copyholders can essentially split the splits so you have four. And you can use Quick Reference panels to keep even more documents at the ready (not sure of the limit). Though, if you’re trying to view that many things, I’d probably recommend a very large monitor, or two. ;-)
Quick reference is what I’m thinking of. Was also thinking of binder searches
It’s tough when we’re not all using the same terms! ;-)
Oh sure, I don’t know the scrivener terms at all. I know how to use it as I do but that’s it
You always have such good Scrivener tips, Gwen. I can definitely use this, as I edit out some scenes, but need to cut and paste some lines into the scenes that are staying.
I just noticed the button to Open Quick Reference panels. That would also maybe be a good place for showing files etc you don’t want to edit, just reference.
I was going to ask you how, after searching all, you can figure out where the found file is in the Binder. But now I see I can see the path by lightly touching the doc name. Maybe this is a new feature, as I recently updated my download.
But here’s one I’d love to know.
Have you found a way to print out the outline or the cork board?
Thank you!
Ada Austen: If you right click on the document title bar and select “Reveal in Binder,” Scrivener will automatically select the document in the binder. As for printing the outline, there is actually an option in the compile for “Full Indented Outline” that will create a document with all the info from the cards, including titles. You can also make it to list the tags and keywords for each document.
Hope that helps!
Thanks, Ada! Split screen is great for working on revisions. There are actually more ways to refer to files in Scrivener than just split screen. Quick Reference panels are little floating windows, which work better when you don’t want to split the screen. You can even go to Window>Float Quick Reference Panels to get them to stay on top of the file you’re working in.
Rob beat me to the punch on your other questions. Reveal in Binder is exactly what I would recommend for locating files.
As far as printing an outline, there are several options in Compile. You could also create a file list in a document and export that by selecting everything you want to include and going to Edit>Copy Special>Copy Documents as Structured Link List, and pasting them into the document. Then go to File>Export>Files.
But you can also (sort of) print the Outliner or Corkboard. NOTE: There will be entries for all files displayed in the Outliner, even those that weren’t expanded to show subdocuments. If you choose the Chapter 1 folder in your Binder (instead of Draft), the printed outline will be limited to Chapter 1’s files.
**As an alternative to the options below, you can export an outline as a CSV file to open in a spreadsheet. Just view the desired folder in the Outliner and go to File>Export>Outliner Contents as CSV.Here are instructions for both on Mac and PC.
– Mac Outline –
1. Go to File>Page Setup.
2. At the top (where it says Page Attributes), select Scrivener. (If you’re on Ventura, expand the Scrivener section below.)
3. Click the Outlines tab.
4. Adjust the settings to determine what is displayed, and how it’s displayed, and click OK.
5. To print the outline, select the desired folder and view it in Outline view (View>Outline if you don’t see it).
6. Go to File>Print Current Document. Either click Print to send the outline to your printer, or click the PDF options button at the bottom left to save the file as a PDF.
– Windows Outline –
1. Go to File>Print Settings.
2. Click the Outlines tab.
3. Adjust the settings to determine what is displayed, and how it’s displayed, and click OK.
4. To print the outline, select the desired folder and view it in Outline view (View>Outline if you don’t see it).
5. Go to File>Print Current Document.
6. Choose a printer or “print to PDF” option and click the Print button. If the indenting is off, I’d remove the indenting in the Print Settings.
You can’t exactly export the Corkboard as it appears, but you can export printable index cards. Here’s how.
– Mac Index Cards –
Follow the same steps as for the Outline above, except in Step 3, choose the Index Cards tab, and in step 5, select the desired folder and view it in Corkboard view.
– Windows Index Cards –
Follow the same steps as for the Outline above, except in Step 2, choose the Index Cards tab, and in step 4, select the desired folder and view it in Corkboard view.
Hope that helps!
Thank you so much!
Good to know, Gwen, thanks.
I use the same method on Word, and it also has a few other methods that Scrivener might have as well. Besides a split screen, there’s a View option to give the document a second window (and then Arrange All to show them both at once), which is more keyboard-friendly than Splitting because you can flip between windows with Alt-Tab and not let go of the keyboard.
Or Word lets you Find not only text but formatting. If there’s a particular scene I need to refer back to, I can Search for a phrase I know there, or maybe put some of a couple of scenes in highlight and Search for highlighting. Then any Control-PageUp or Control-PageDown will Find Again and jump me between the scenes I need. Or there’s searching for “hapt” (to get “Chapter”) or for centered format (to find each chapter and scene break marker).
Scrivener probably has most of those tools, in some form. On either software it’s really about learning to see how we work, and the smoothest way the program can fit into that.
That’s absolutely true, Ken. Half the battle is knowing the software you’re using. Word did not have many of those features when I started using Scrivener, and now I can’t let go of my Binder and other things. I love using Alt/Command+Tab to switch between programs. On the Mac, I can use Command+` to switch between instances of Scrivener too. Not sure about Windows.
You can absolutely search by format in Scrivener (Edit>Find>Find by Formatting), which also includes finding annotations and comments. And there’s a powerful project search as well. Thanks!
I’m a Scrivener newbie. I didn’t know it could do this. I’m excited by the possibilities! So many neat little tricks to be found. I’m a long time Word user, and the learning curve is a bit steep for me in Scrivener, as my brain has to adjust. But the more Word pisses me off, the more I’m coming to like Scrivener.
There are so many fun things in Scrivener. Don’t let the learning curve overwhelm you. Get comfortable with the basics, and then add the other things as you need them. There are plenty of features I don’t use at all as part of my process, so no need to know them all. When you’re ready to expand your knowledge, check my archive of Scrivener posts for inspiration, either here, or my complete list at https://gwenhernandez.com/scrivener-training/scrivener-tips/.
Good luck!
Gwen: as always, your tips and explanations are clear and understandable. I never stop learning about the great things Scrivener has to offer. Thank you. 👍
Thanks, Mark!
I have two monitors – and the big one ALWAYS has two files visible – I can’t imagine using Scrivener without it.
My combination substitutes for having all that stuff spread out on my desk AND it is all searchable at the drop of a hat.
When writing, I also have the Journal of the current writing open, my Dramatica file for the WIP, my own lists of prompts for my writing method, and many other things (such as the previous scene) easily clicked on because I stagger my files and leave corners visible to click on easily.
And I use ALL of that as necessary, plus the Calendar (my WIP is very tightly tied to the calendar for the years 2005/2006), because it all matters. It’s almost as if I’m writing creative non-fiction, except that it is based on MY (fictional) story.
For me, all of that matters, because I aim for a reader to be seduced into thinking… IT’S ALL TRUE!
It would be impossible without Scrivener – glad I leaned it from your course years ago.
That sounds amazing, Alicia! Thank you for sharing your process. I’m glad Scrivener helps facilitate your writing, and that I had a small hand in making it happen. :-)